Getting started with Studiohaus
A short orientation to the app — what lives where, and the three things to do on day one.
Welcome. Studiohaus is the studio behind the studio — the back-of-house for everything that isn't the design itself. Leads coming in the door, clients you've signed, projects in motion, and the money side of all of it. This is your first day in the app: where things live, how the work is shaped, and the three small moves worth making before anything else.
The shape of the app
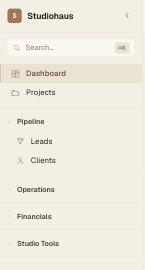
Everything hangs off the left nav. The two things you'll reach for most sit at the very top on their own:
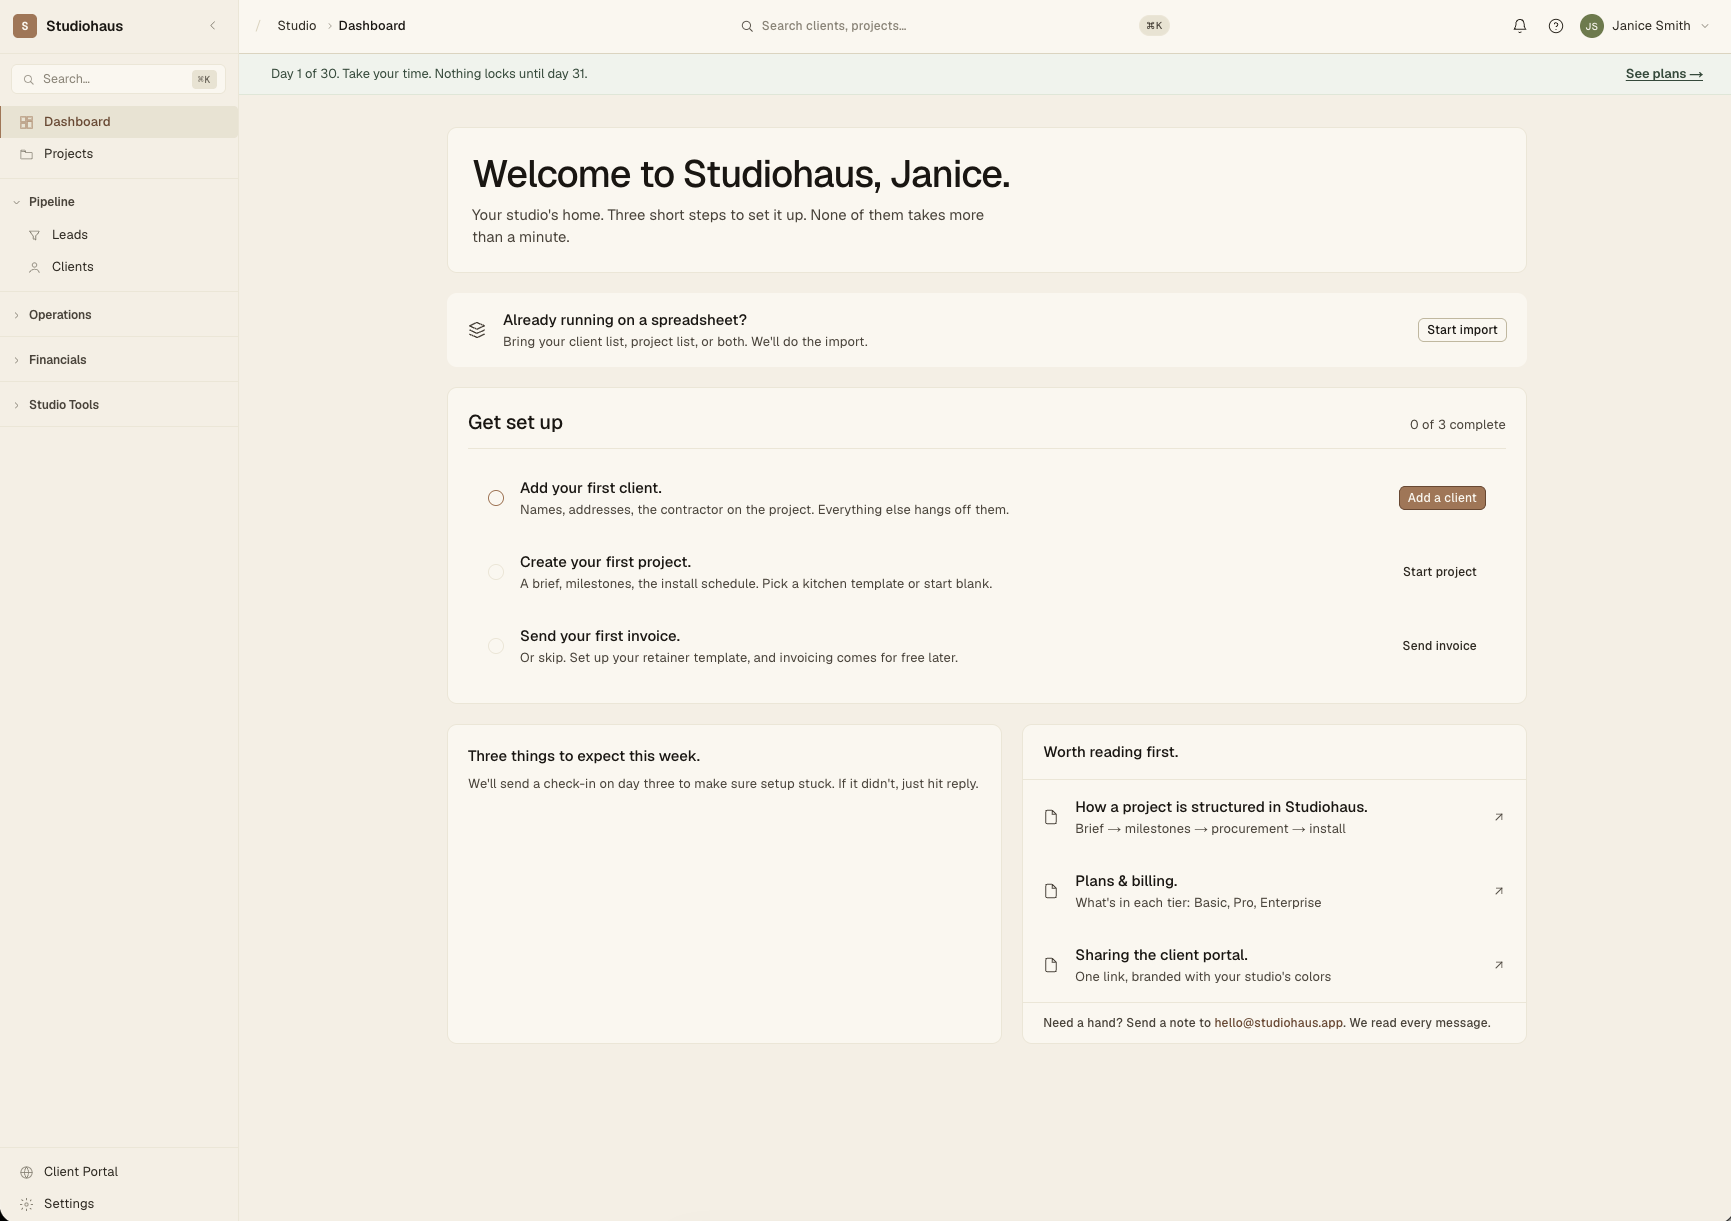
- Dashboard — the room you walk into. What's due, what moved, the numbers that matter today.
- Projects — the actual work. Every project belongs to a client and opens onto its own set of tabs (more on that below).
Below those, the rest is grouped so related work sits together:
- Pipeline — Leads (anyone who's reached out but hasn't signed) and Clients (the people who have).
- Operations — Calendar, Vendors, Procurement, and Products (your library of furnishings and finishes).
- Financials — Invoices, Reports, and Studio Performance (how the business is doing, rolled up across every project).
- Studio Tools — Templates, Marketing, the Route Planner, and the Product Clipper (the browser extension that pulls products off any site straight into your library).
Two rows sit at the foot of the nav on their own: Client Portal — the white-labeled space your clients log into — and Settings.
The row you're currently on is marked quietly: a soft paper-toned pill with a thin terracotta edge down its left side. That terracotta is the app's "go" color throughout — the button that commits an action is always the terracotta one. (Worth knowing early: a green-tinted highlight means something's simply selected, amber means in-progress, and a deep oxblood button is the one that deletes. The app stays calm on purpose; color is how it talks.)
Three things to do on day one
You don't have to do these in order, and you don't have to do them today. But they're the three small wins that make the rest of the app feel like home.
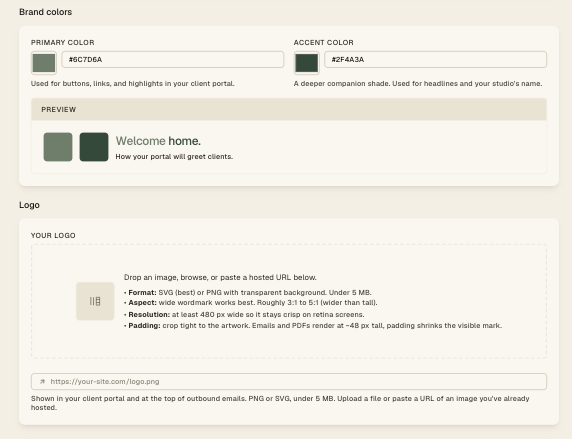
1. Add your studio's branding
Open Settings → Branding. Upload your logo (a light and a dark version if you have them) and set your brand and accent colors. This is the paint that shows up everywhere a client sees you — the portal they log into, and the contracts and invoices you send. Five minutes here and the whole app starts to look like yours.
2. Capture your first lead — even a pretend one
Go to Leads and click New lead. Put in yourself, a friend, or a stand-in: "Test lead, Instagram, kitchen remodel." Open it, change the status, then try Convert to client — that lifts the name, email, phone, and project address straight onto a fresh client record and files the lead away as won. Two minutes spent poking at this saves an hour of "wait, where do I…" later.
When you're done, delete the test from its detail page (Delete, upper right).
3. Invite your team
Working with anyone — a junior designer, a PM, a bookkeeper? Head to Settings → Team and send an invite. Each person gets a role, and Roles & permissions (just below Team) is where you decide exactly what each role can see and touch. A one-person studio can skip this entirely.
Finding your way around fast
Two things will save you more time than any tour:
- Press ⌘K (Ctrl-K on Windows) anywhere to open search — jump straight to a client, project, or invoice by name without hunting through the nav.
- Recents sits in the nav and remembers the projects you've been in lately, so the work you're actually doing is always one click away.
Getting paid, and your books
Invoices live under Financials, and on each project under its Invoices tab. When you send one, your client pays it directly — card payments run through Studiohaus's built-in Stripe processing, and the money lands in your account. If you keep your books in QuickBooks, connect it under Settings → Integrations and Studiohaus will sync your invoices across; QuickBooks is for your accounting, not for collecting from clients.
A note on your trial
If you signed up directly (not through a teammate's invite), you started a 14-day trial of Pro — the full app, nothing held back: client portal, vendor tracking, reporting, Templates, the Product Clipper, QuickBooks sync. Your card's already on file, and the first charge runs when the trial ends, so there's no scramble on the last day.
A small banner up top counts the days down. When you're ready to decide, Settings → Billing → Plan & payment is where you pick: stay on Pro ($99/mo), step down to Basic ($59/mo), or talk to us about Enterprise if you've outgrown three seats. Nothing you create disappears if you change tiers.
Where to go from here
Most studios start in one of two places, depending on their stage:
- Already have signed clients? Skip leads for now and go to Creating a client. Add the people you're already working with, then open their projects.
- Just opening the doors? Start with Creating your first lead — build the habit of capturing every conversation, however casual.
Help and feedback
Stuck on something? The help icon in the top bar opens this knowledge base alongside three short forms — support, bug report, and feedback. An idea, a missing piece, a paper-cut: send it. It lands with us, and we read every one.