Procurement: purchase orders and vendors
Tracking what you've ordered, from whom, and when it's landing — Pro-tier feature.
The Procurement section is where purchase orders and the firm vendor book live. It's the answer to "is the Smith dining table on order yet?" — and "when did we last use Restoration Hardware?" — without digging through email or your accountant's spreadsheet.
Procurement is part of the Pro and Enterprise plans. On Basic, you'll see an upgrade prompt where the orders table would be; on Pro and up you get the full vendor book and PO tracker.
What's in here
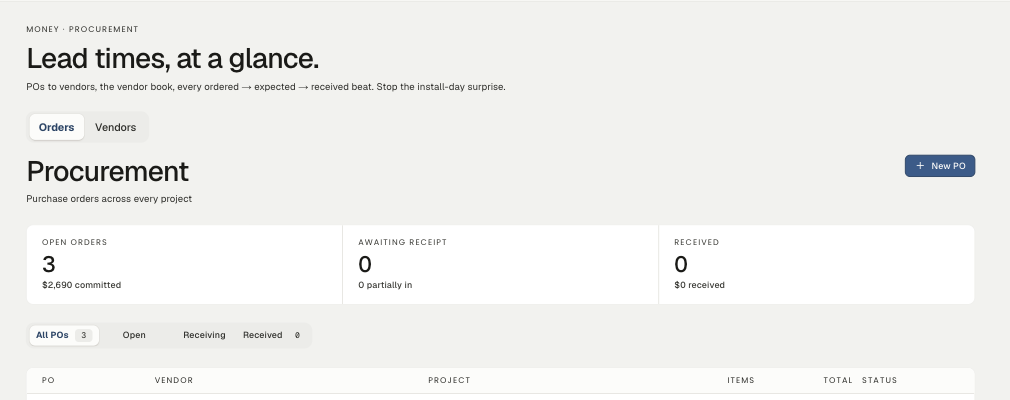
Procurement (under Operations in the left nav) has two tabs:
- Orders — every purchase order your firm has issued, across all projects: vendor, amount, lead days, expected date, status.
- Vendors — your firm's vendor book. This tab opens the main Vendors page, so the vendor book stays in one place; Procurement is just another way in.
The PO lifecycle
Every PO is in one of four statuses:
- Ordered — you've sent the PO but haven't heard back. The starting state.
- Production — the vendor confirmed and the item is being made or pulled.
- Confirmed — the vendor has confirmed a ship date or pickup window.
- Received — items are in your possession (or at the warehouse).
The status sets the badge color in the orders table and feeds the Procurement report, which surfaces POs running long.
Creating a PO
- Open Procurement → Orders.
- Click New PO at the top.
- Fill in the form:
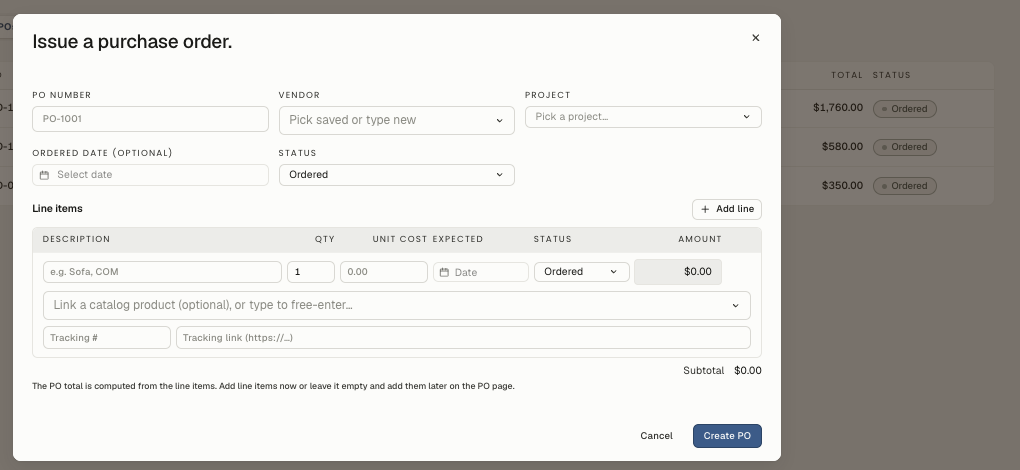
- Number — your firm's scheme. "PO-1042," "2026-014."
- Vendor — pick from the dropdown, or type to add a new one.
- Project (optional) — links the PO to a project so it ties into that project's cost reporting and can be filtered by project in the orders list.
- Amount — the total you're committing. (Per-item detail lives on the project's Project Library; the PO itself is a header record.)
- Lead (d) — how many days the vendor quoted. Feeds the lead-time view in the Procurement report.
- Ordered — when you sent the PO. Defaults to today.
- Expected — the date you expect delivery. Set it from the quoted lead time.
- Status — defaults to Ordered. Update as the PO moves.
Click Save. The PO appears in the orders table.
Updating status
Fastest from the orders table itself — each row has an inline status picker, so the common case ("just got the email confirming production") doesn't need the detail page. For bigger changes — a vendor typo, an amount adjustment, re-attaching to a different project — open the PO from its row.
The vendor book
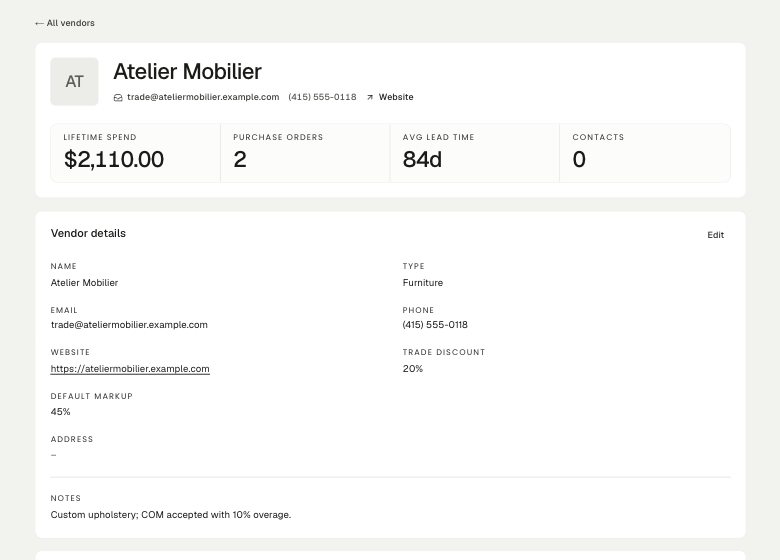
Open Procurement → Vendors (or Vendors in the left nav — same page). It's a firm-wide directory of everyone you order from. Each entry has the vendor's name and type, contact info, typical lead time, free-form notes (terms, minimums, account number), and the history of POs you've issued to them.
Adding a vendor is one-time: click New vendor, fill in the form, save. From then on they're in the PO dropdown across every project.
The Procurement report
The Reports hub has a Procurement report that pulls two things together:
- Lead times — POs by days-since-ordered against the lead time quoted, so vendors who run long stand out and you can set realistic install dates.
- Top vendors by spend — your outlay per vendor, handy for renegotiating trade discounts and the year-end accounting hand-off.
Related
Related in Financials
- 01Financials→Connecting QuickBooks OnlineConnect QuickBooks Online so Studiohaus syncs your invoices and payments into your books automatically — clients still pay by card in their portal.3 min read· Updated Aug 22, 2026
- 02Financials→Billing from specs (deposits and balances)Turn a selection of project specs into a draft invoice with one click — full amount, deposit only, or remaining balance.4 min read· Updated Aug 22, 2026
- 03Financials→Connect your Stripe accountConnect your firm's existing Stripe account so clients can pay invoices online.1 min read· Updated Jun 12, 2026
- 04Financials→Recording a paymentHow to mark an invoice paid when the money lands — automatic card payments, offline payments, and what each invoice status means.3 min read· Updated May 1, 2026